Ok, so bottle crafts are the most challenging of all the glass arts I have tried so far. I can’t count the number of bottles I have tried to cut that have resulted in being tossed due to a bad break. At least I have learned to keep them separated by color so I can maybe melt them down in my kiln.
I have tried, once so far, to melt the broken pieces in a pot melt. But it didn’t go as planned. I will be trying again and will update what I have learned as I go.
What I have produced so far is shown below. I have enjoyed combining stained glass and engraving to create what I think are unique projects. When I can successfully cut a bottle, it does get made into something fun.
Fusing broken bottle glass: This is an experiment that is in work.
What do you do with those wine bottles that you didn’t successfully break? Those ones that crack when you try to cut them in half or into rings? I seem to have a whole lot of those. Still trying to master the perfect cut. I don’t want to waste the glass and since my family goes to all that trouble to save the bottles for me (believe it or not, including my ex-husband and his wife!), I have to put them to some use. So I thought, why not smash them into small pieces and melt them down in the kiln? This project has the potential for lots of lessons learned.
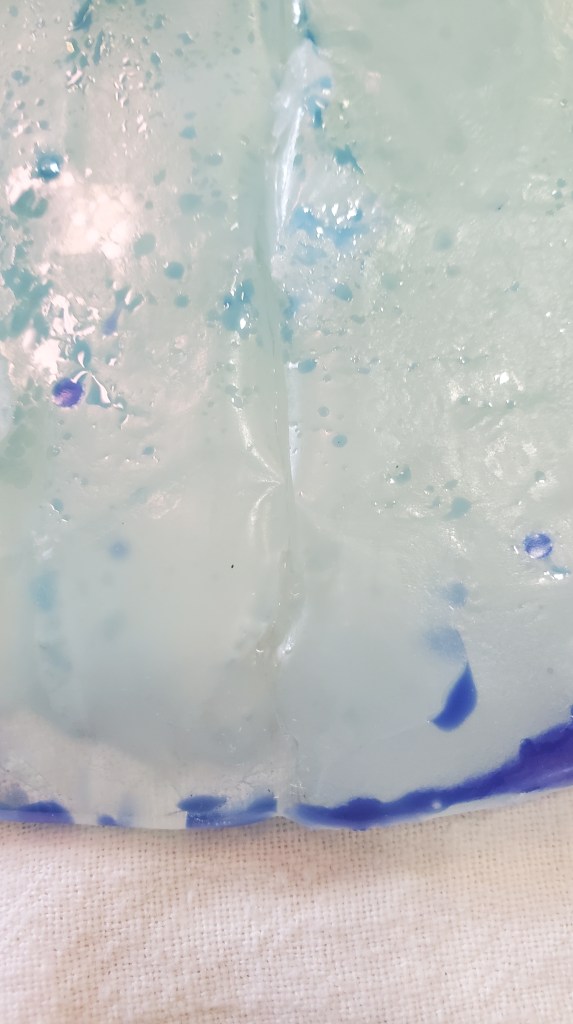
First fire: After smashing the clear wine bottle I had that didn’t make it past the cutting stage, I arranged them on a 12 inch round dam. I tried to layer the glass so it overlapped and tried to keep it to about 6 mm deep. I used a schedule specific to COE 82 that is pre-programmed into my kiln. This is the starting point…The result was kind of cool. I’m only sorry I didn’t capture a picture at this point. The only real issue was lots of devitrification.
Second fire: So, I fired it again. This time, I added some blue frit to give it a little interest. I also was hoping to reduce the devitrification, but it didn’t. Again, wish I had taken a picture at this stage. This blue frit did add some interest.
Third fire: This is where it all fell apart, literally. The idea was to make a bowl out of the slab. So I draped it and below is what I got
Not only did it crack, but the release seemed to ‘bake in’ to the glass.
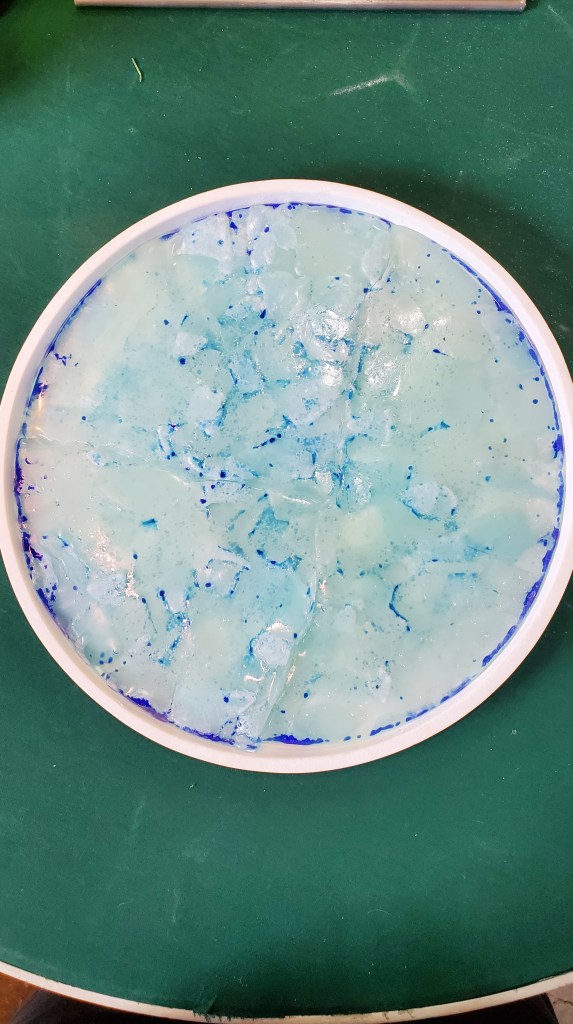
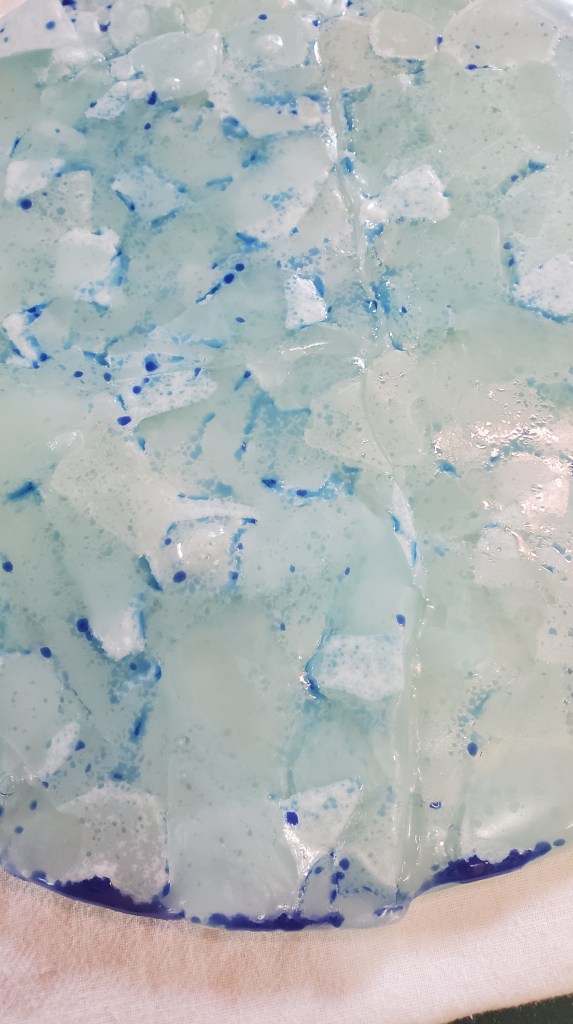
Third fire: I put the 3 pieces back into the dam trying to match the cracks together as much as possible. I placed it upside down thinking it would slump back down to flat and the cracks should line up. They did fairly well, but the cracks are still visible. I don’t think I either got it hot enough or held it at high temperature long enough.
After doing some research, I am going to fire it a 4th time and add some clear powder to see if I can get a better polish. I also want to to see if the cracks can become less visible. The goal is to try and get it liquid enough for it to flow. The glass seems very thick, so I may want to look into trying to create a larger dam to see if it can thin out. This project is to be continued……
Fourth and final fire..
This fire did change the flow of the piece. The center is no longer as thick and the glass now seems to be a more consistent weight through out. But, those cracks still show. See pictures below. At this point, I am going to leave the plate of glass alone. As i learn a little more, I’ll try again. I’m not sure this piece will ever be whole again. But, I like the look of the glass that I am going to crush more bottles up and try this again.
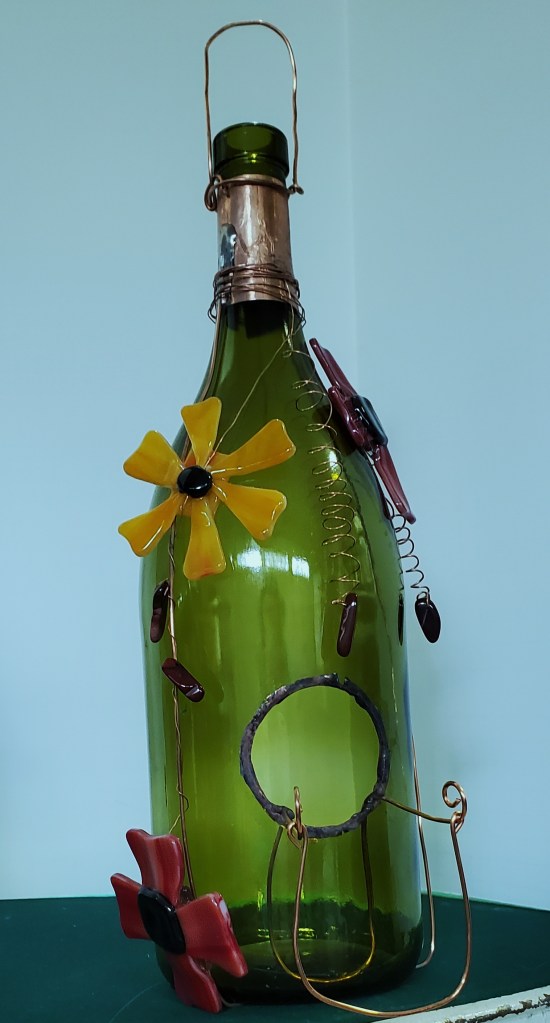
A wine bottle bird feeder: For Christmas, my husband bought me some diamond drill bits. Well, guess who is using them? Not me. I couldn’t figure out how to establish a jig that would keep the bottles secure while I tired to drill a hole in it with one of these bits attached to a hand drill. Didn’t seem all that safe to me. I just let my husband figure out how to set up his milling machine (a monstrosity that takes up a whole corner of our garage) and let him go for it. He managed to drill holes in 7 bottles for me. But then he knocked two off the table, so I have 5 large wine bottles to make bird feeders from. This one is a prototype:
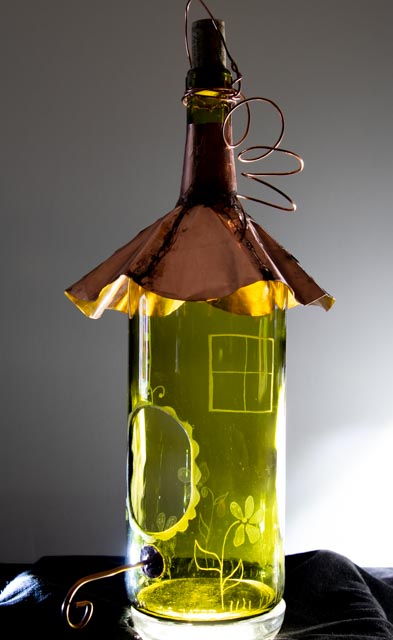
I call this prototype the “Tiki Bar for birds”. However, it is currently being used by the squirrels in the back yard. It is hilarious to watch them. But it has held up well to their activity.
After my husband drilled two side by side holes, effectively creating an oval opening, I engraved some simple flowers and windows on the wine bottle, then added a copper roof. The biggest challenge of the project was the roof. I cut 8 triangles and soldered them together and attached it to the neck of the bottle using wide copper foil and soldered it to the neck. I would like to find something that would keep the copper form discoloring after it has been outdoors for a period of time. If I did this again, I may try spraying a clear coat on the copper to see if it protects from the elements. I then drilled a small hole and added a perch – but, for the squirrels, it just gets in the way.
I am now working on the 5 bird feeders and will post them when they are complete.

This is the second in the series of 5 bird feeders.
It’s a good thing I don’t charge by the hour. This bird feeder is decorated with hanging fuchsia flowers made from stained glass. Each flower is attached from the neck of the bottle by copper wire. The perch runs through both sides of the bottle and is made of copper tubing. The flowers are loose enough that they make a very gentle windchime as well as the bird feeder.
The total hours, because of the stained glass construction, was about 12 hours. Certainly not something that could be made in a production form. But I think it is unique and dainty.
The following 3 bird feeders are the remaining of this current series. These last three are decorated with fused flowers attached using thin copper wire soldered to the neck of the bottle. This allows the flowers to act as a wind chime.
I used fused flowers for simplicity. After creating the first bird feeder using stained glass flowers, I learned that the effort would not be worth the price I would be able to charge for these. The first bird feeder took over 12 hours to produce because of the foiling and soldering needed to assemble the flowers. Both those steps are eliminated when using fused flowers. The timeline is about the same because of the firing of the flowers, but the time can be spent on another project while the kiln did the work. The only cost is a portion of the electricity use to fuse the flowers.
Two of the last bird feeders have “swings” for the perch. Just something for a little fun and different.


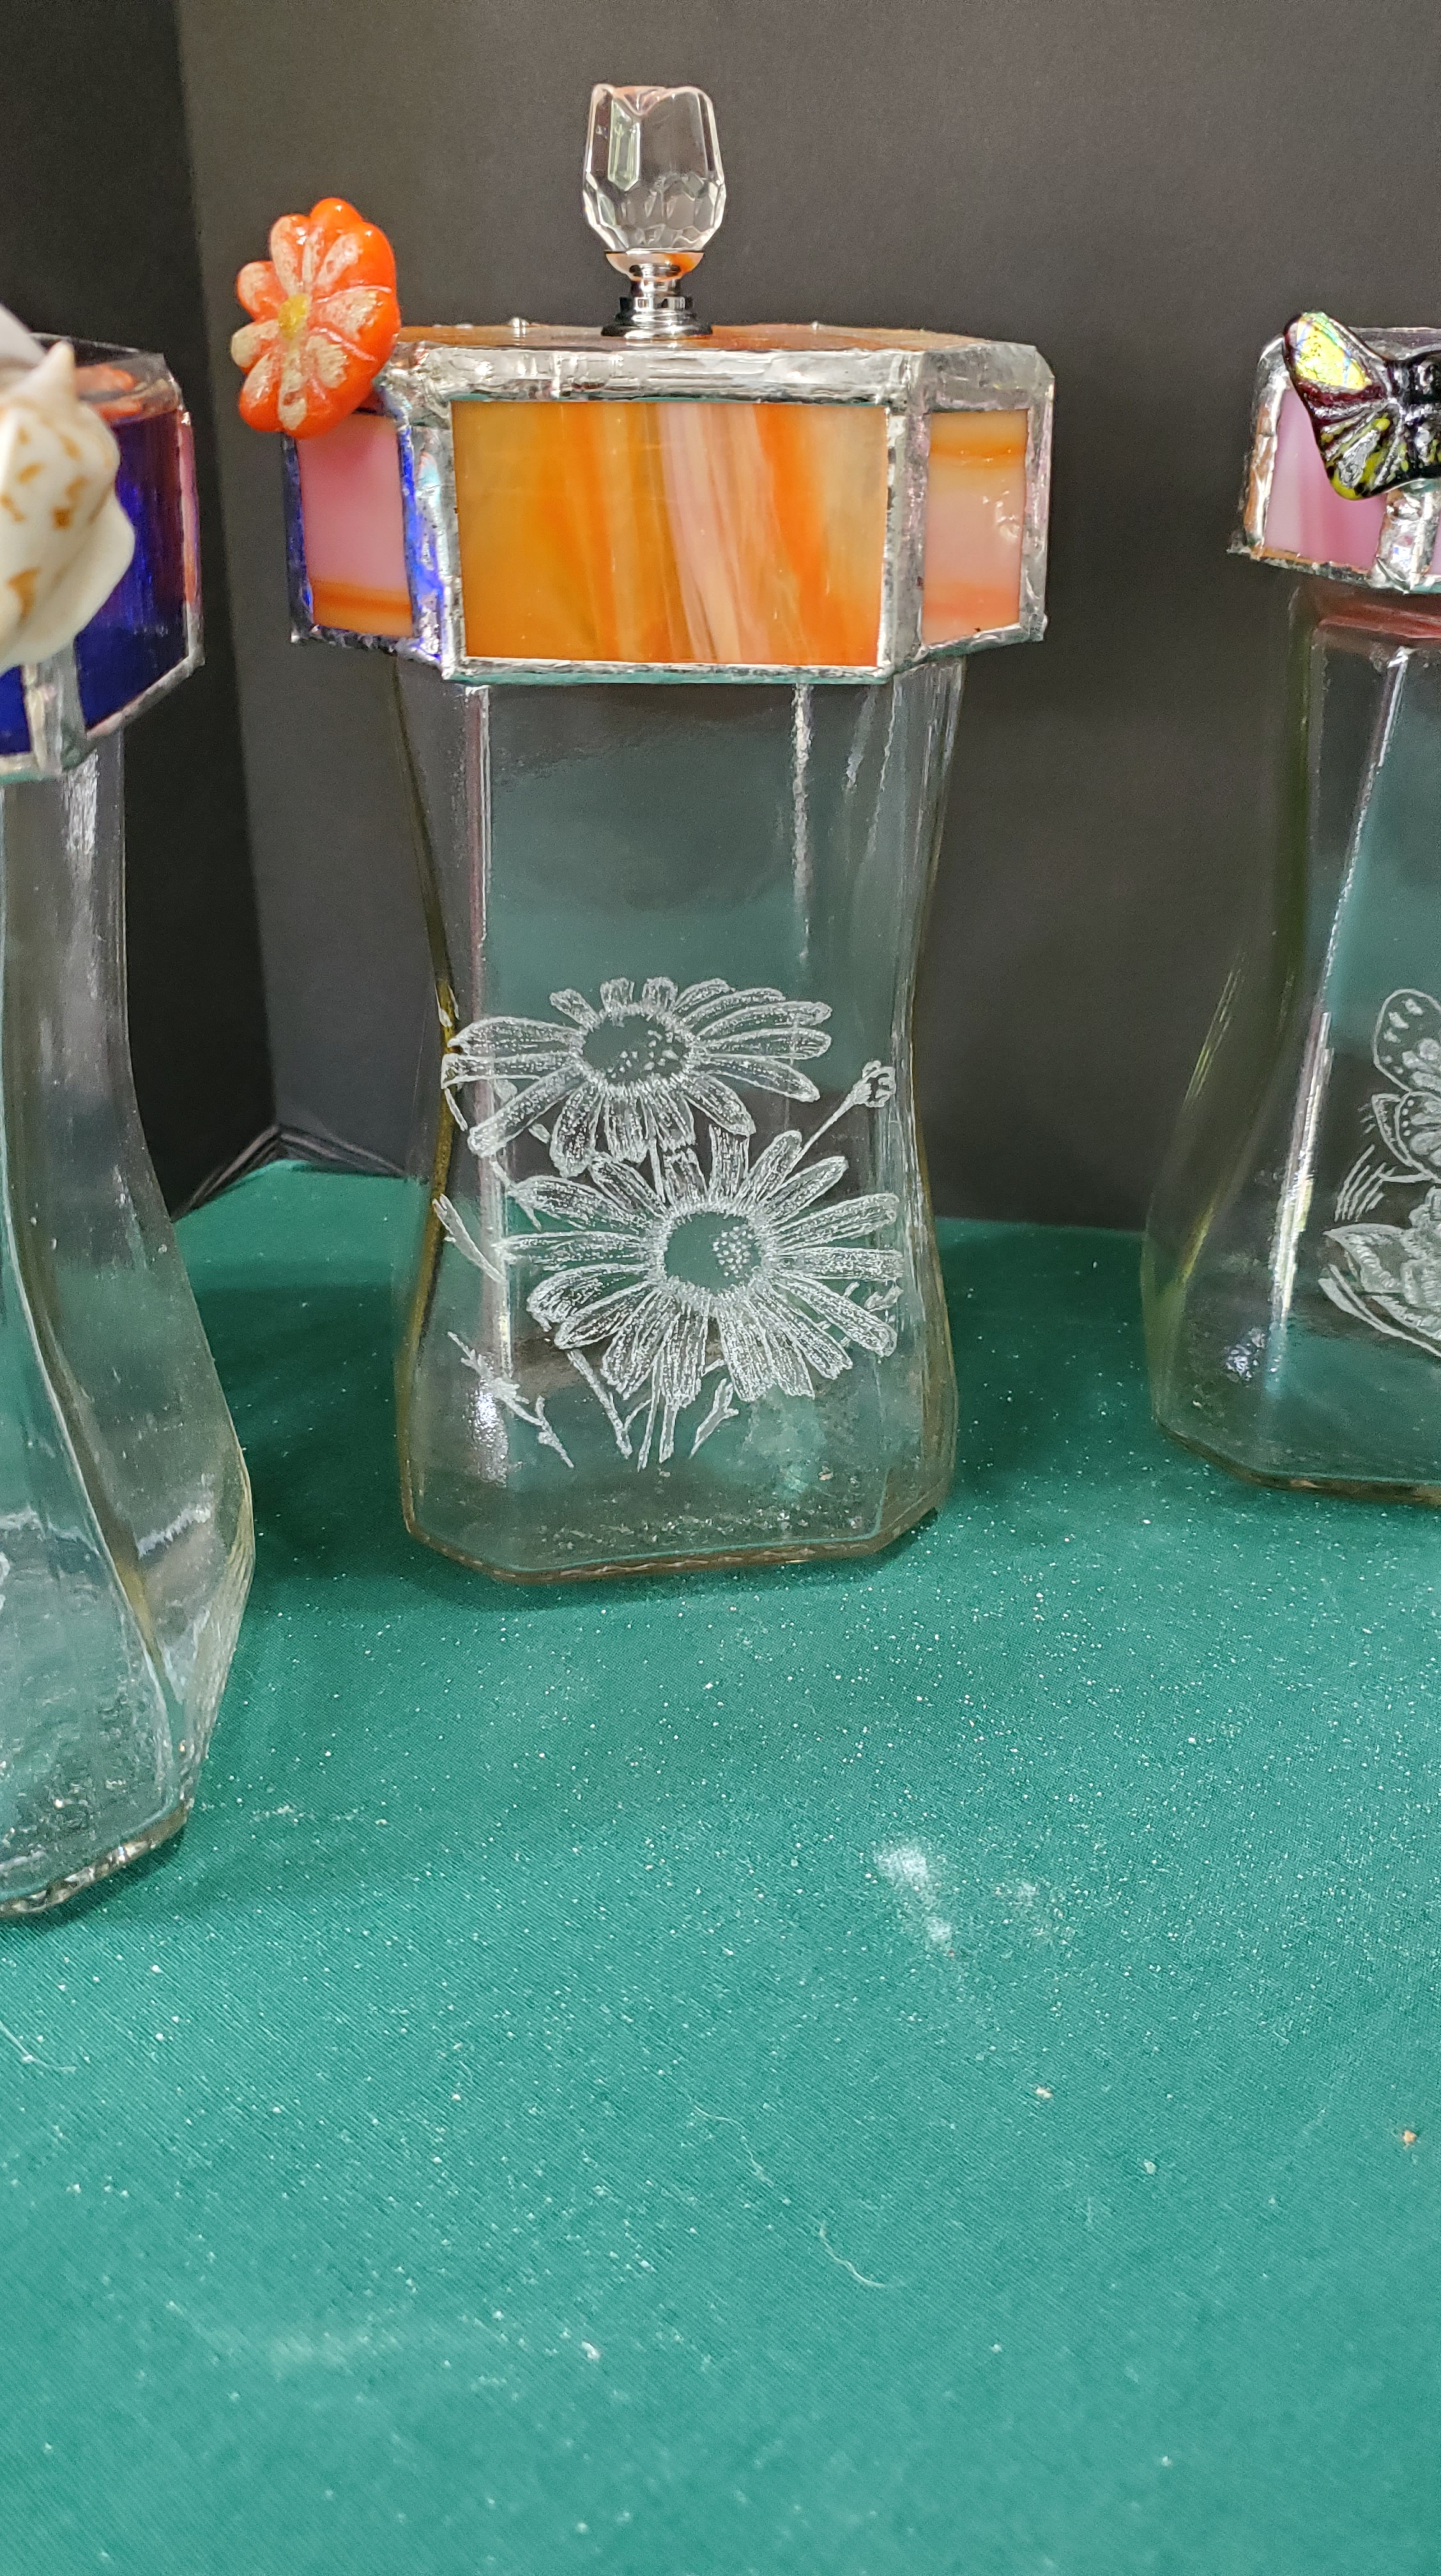
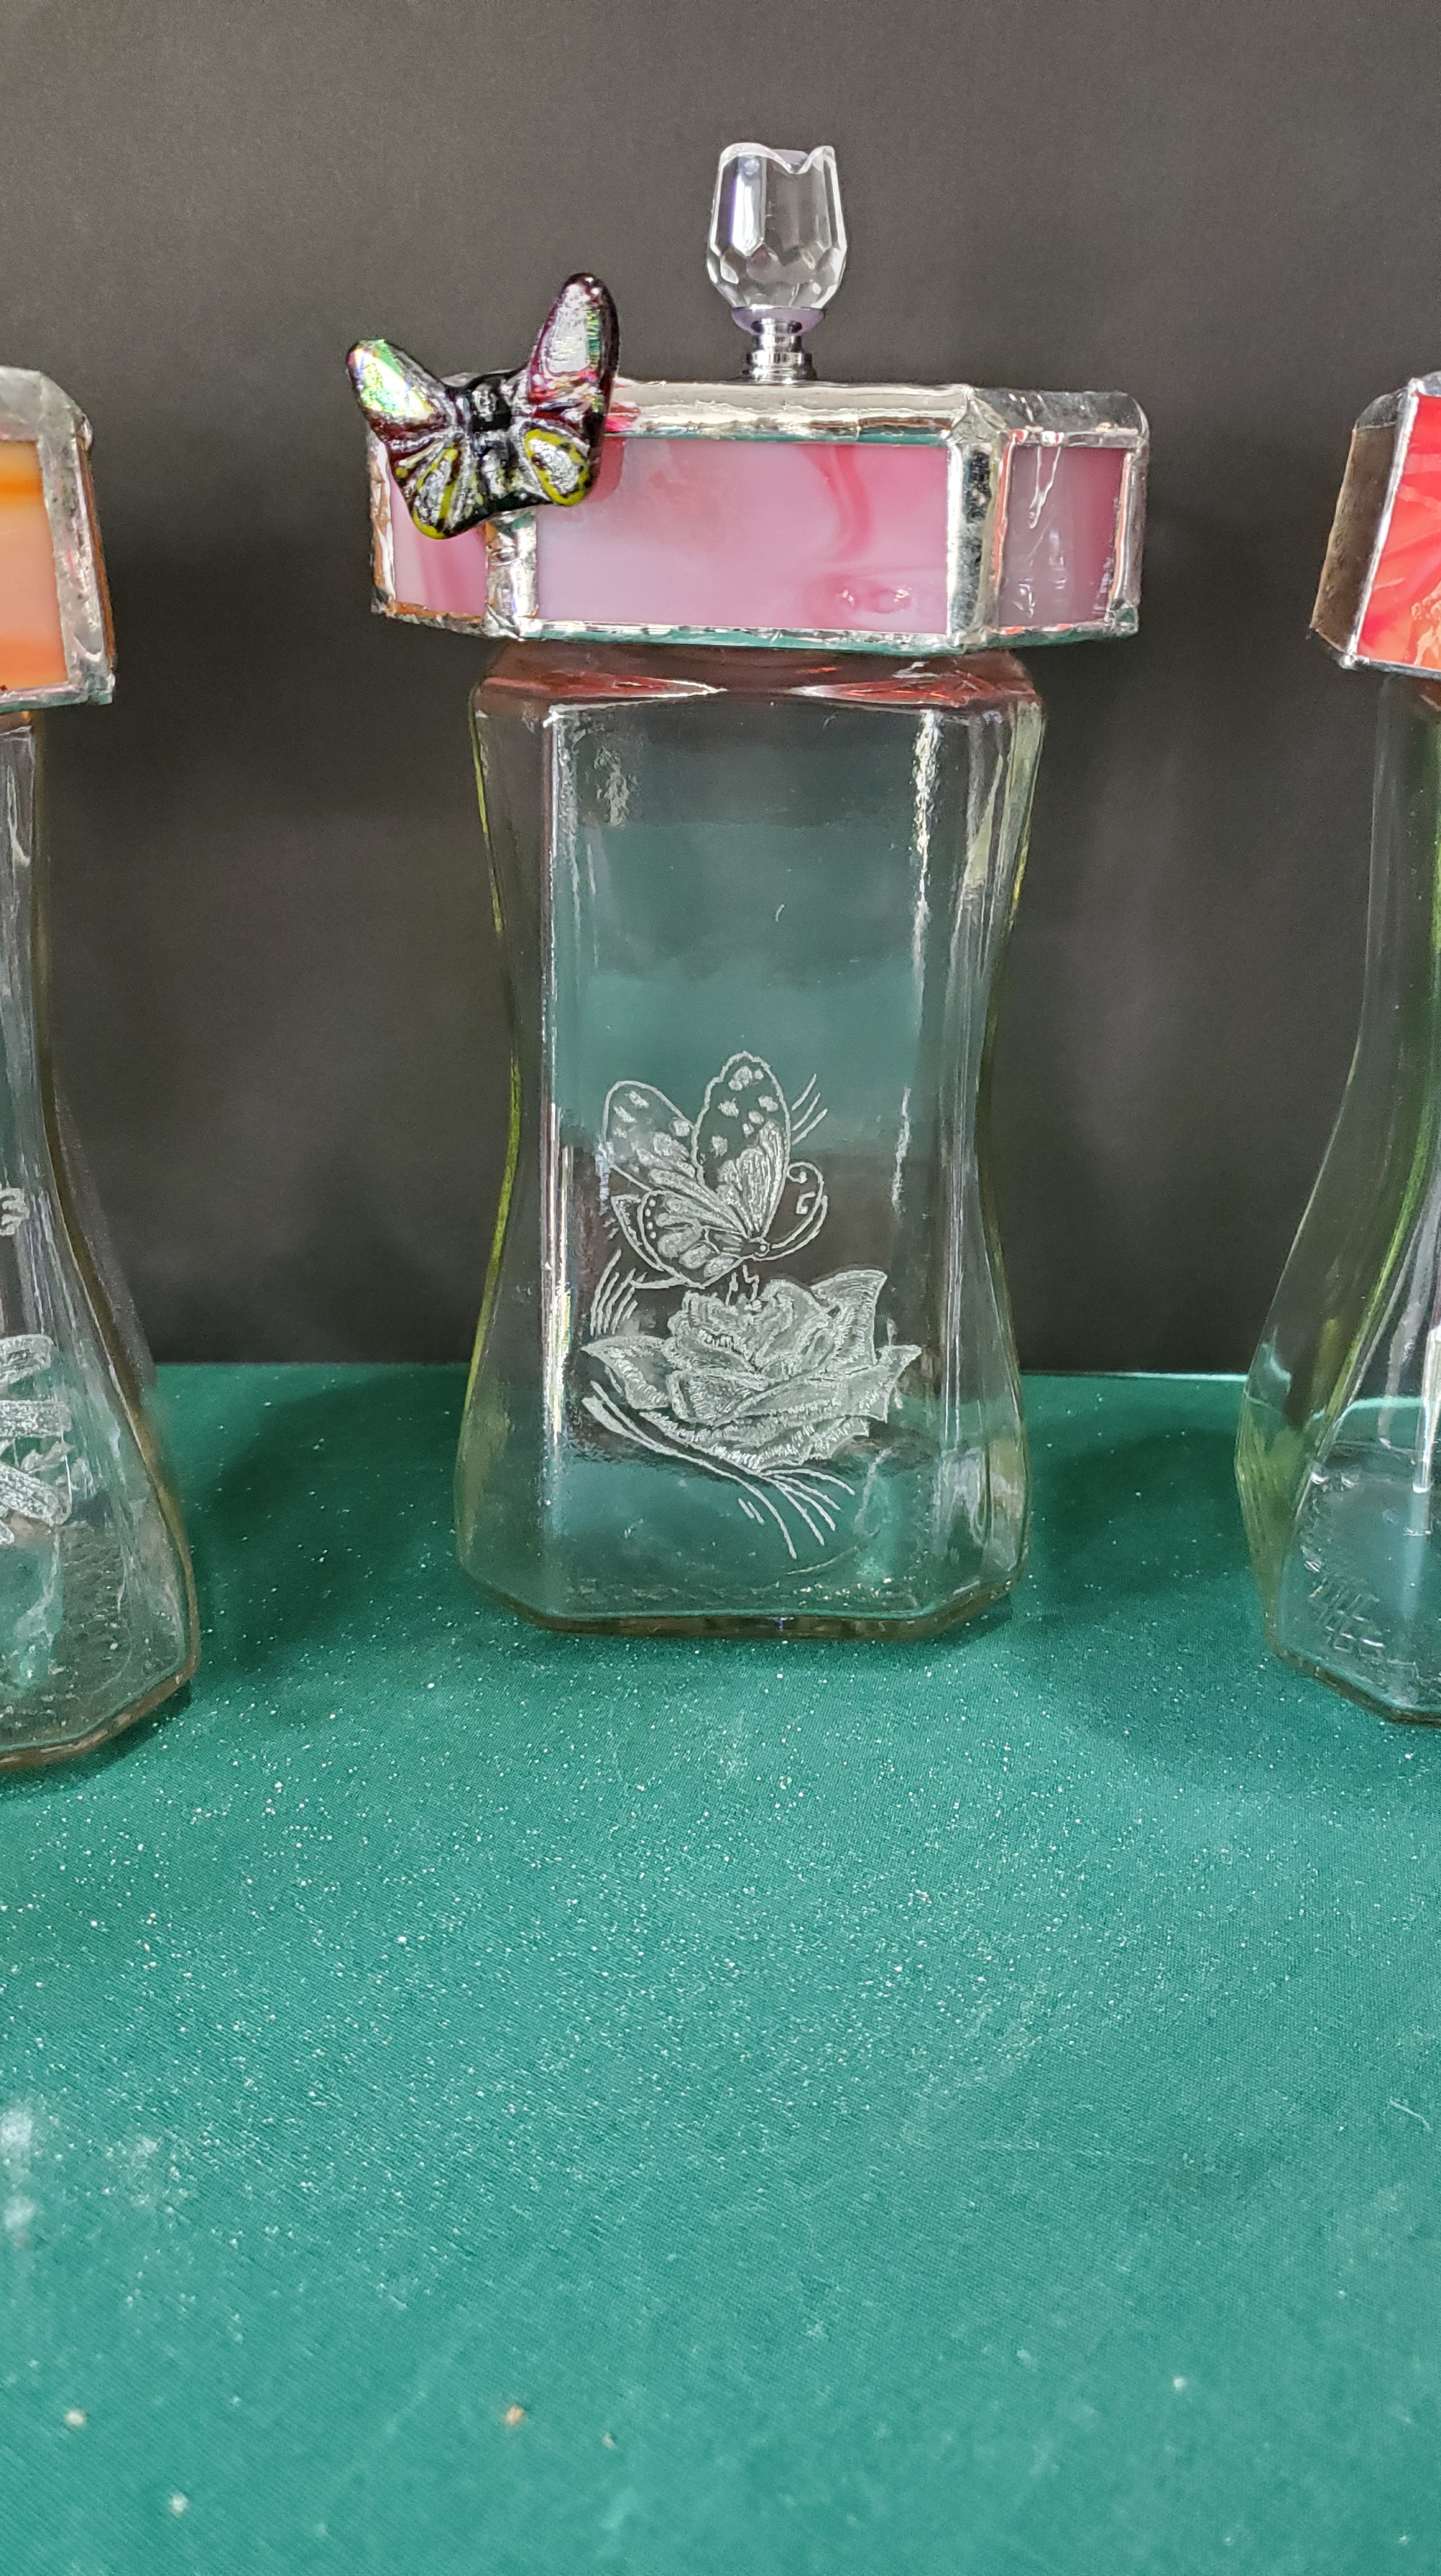
Canisters from coffee jars: So, are these bottle crafts? Or stained glass? Or glass engraving? All of the above. I chose to share them here because they started life as a jar, so I consider them to be recycled projects.
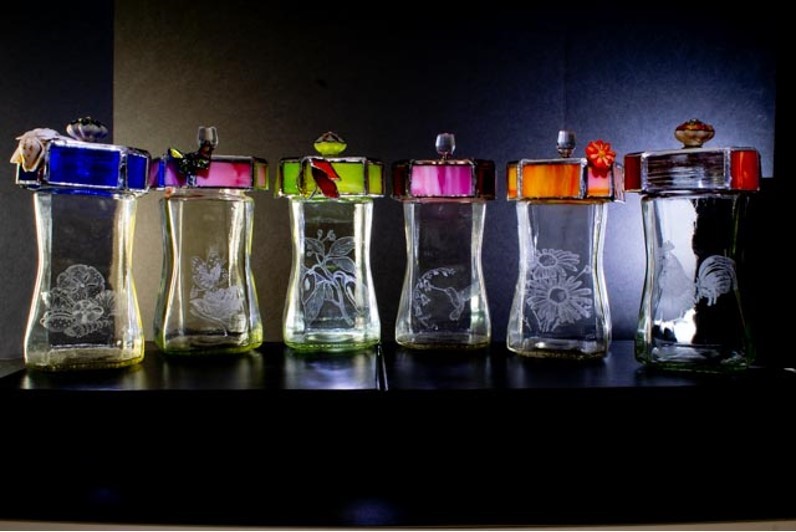
As I previously mentioned, my mother and her husband go through a good number of these jars. They are instant coffee jars. Since I like the shape of them so much I think they make great small canisters for just about anything. I design them to look good sitting on a counter, either in a bathroom filled with cotton balls or the kitchen filled with tea bags.
I tried to use designs than many folks would like. Below is a tile of all 6. The photography is not the best, but you can take a closer look.

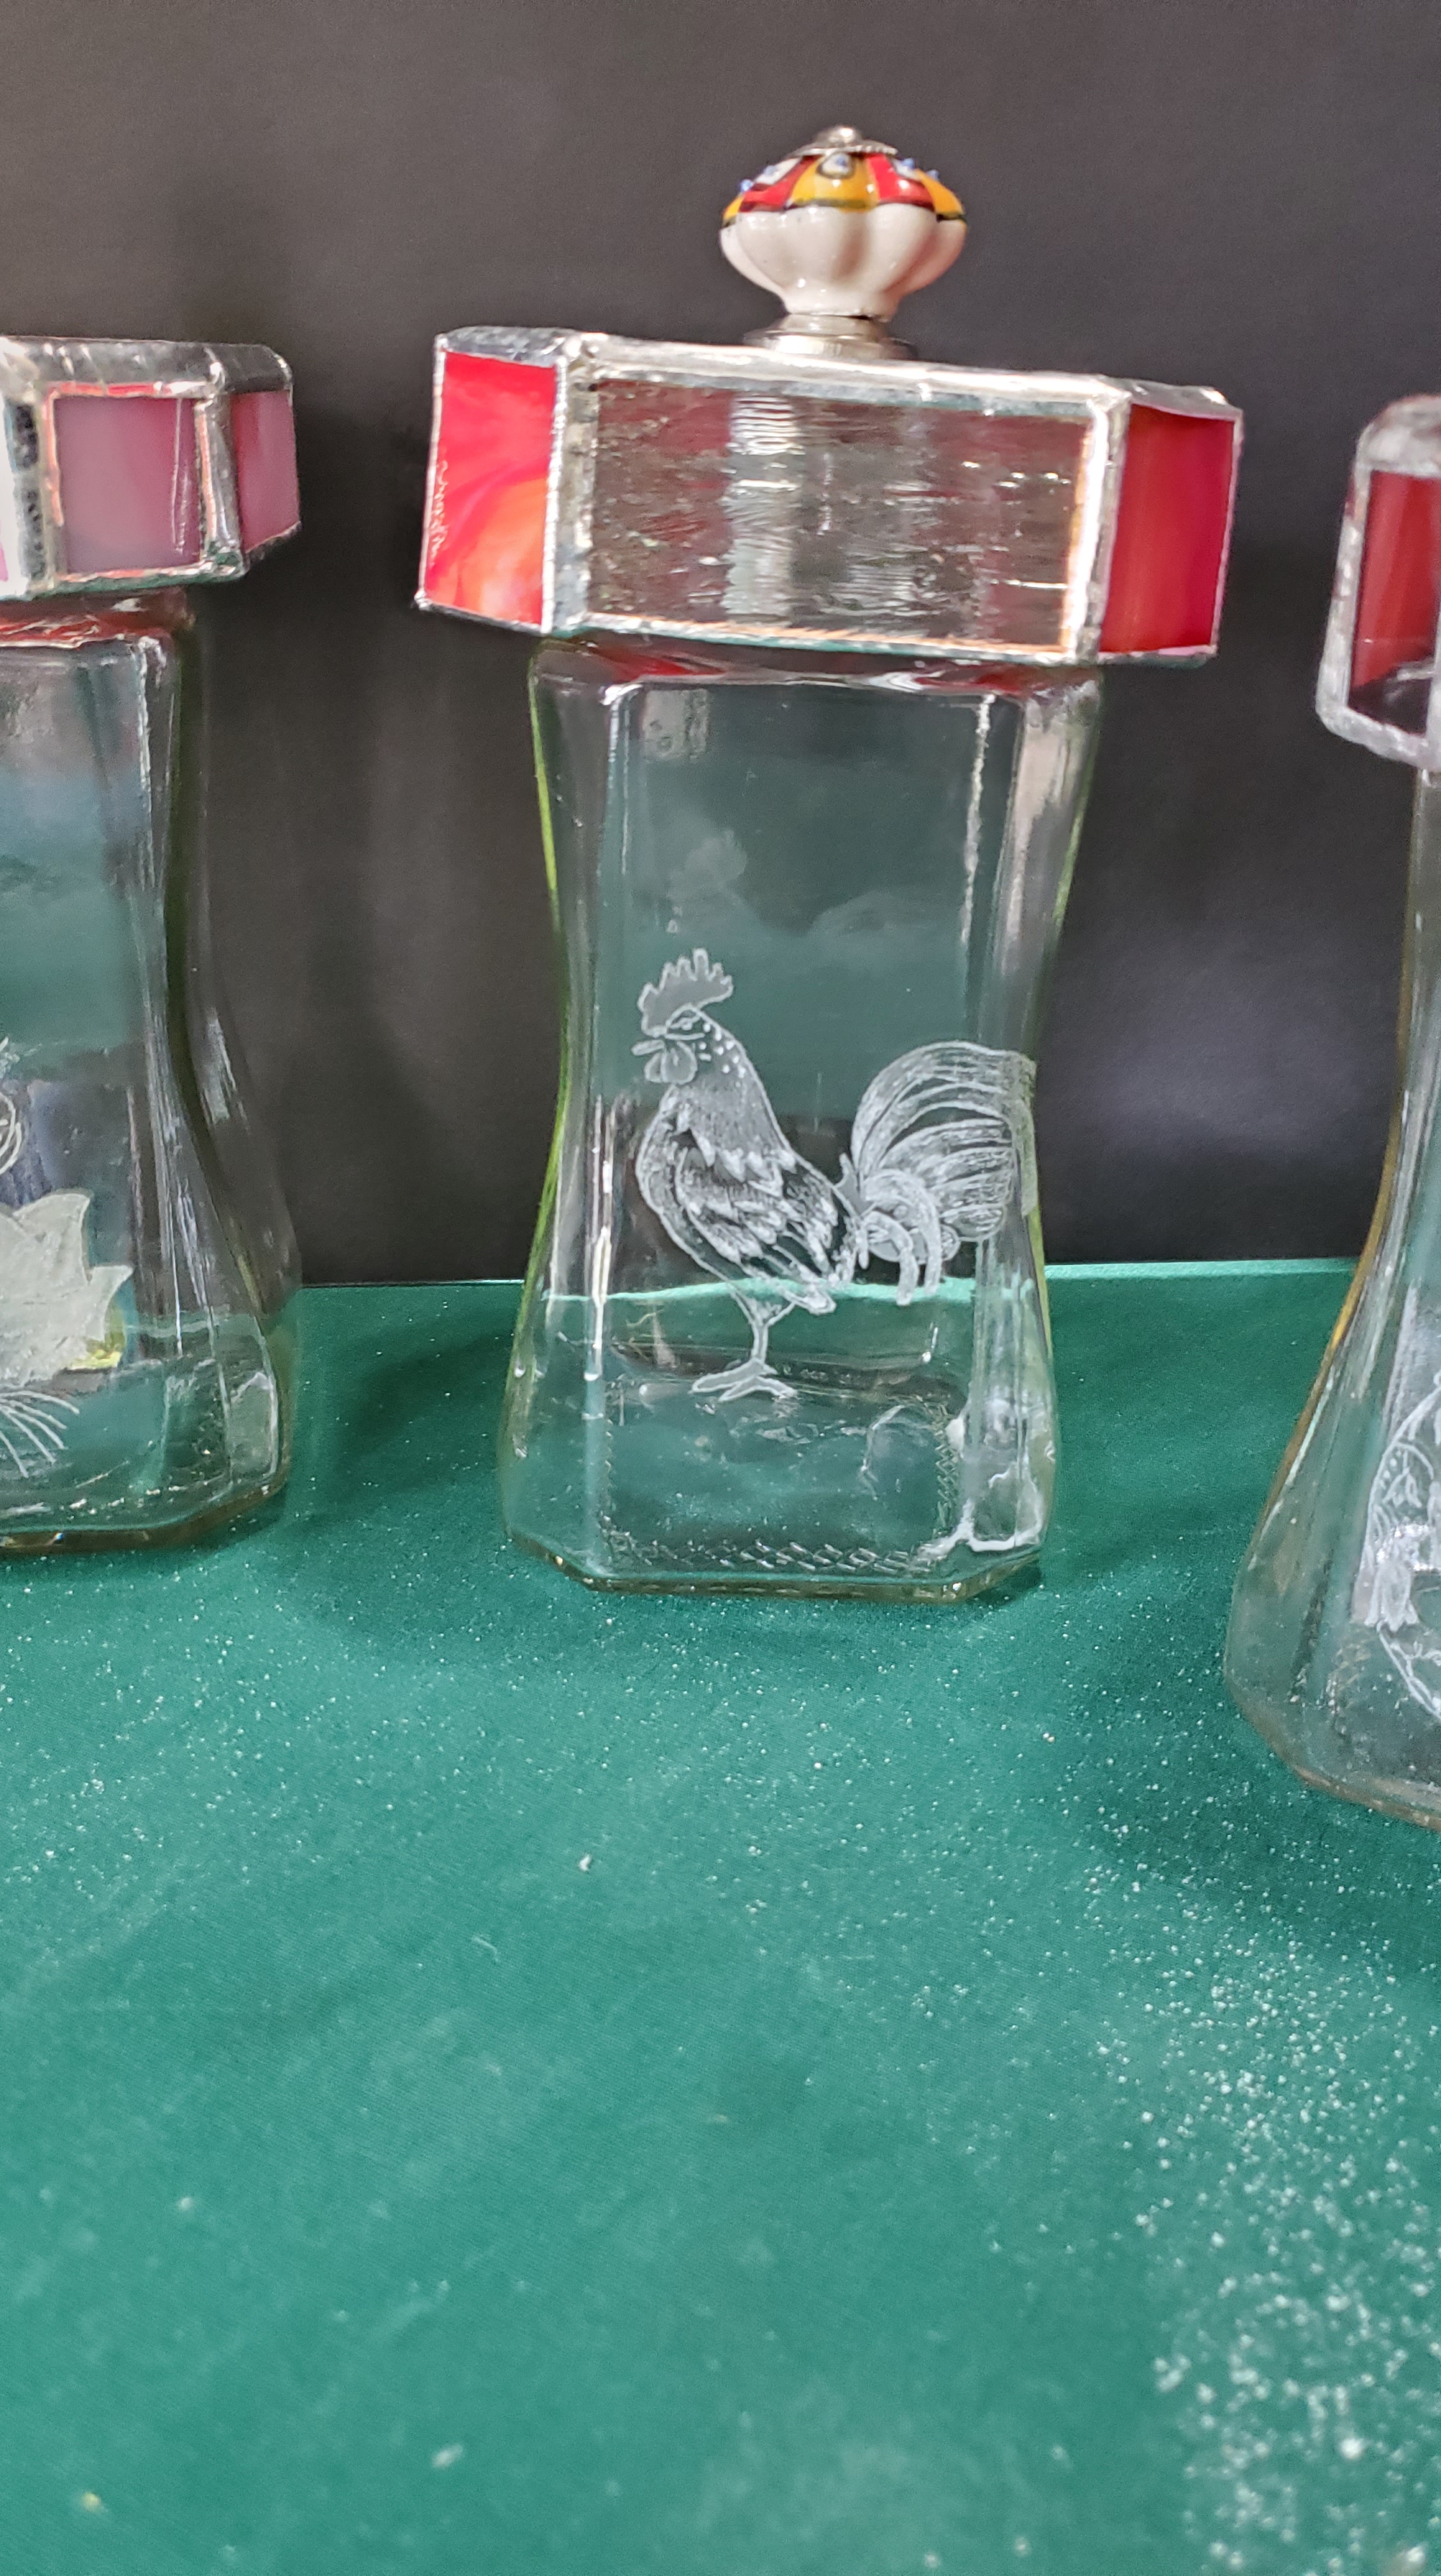
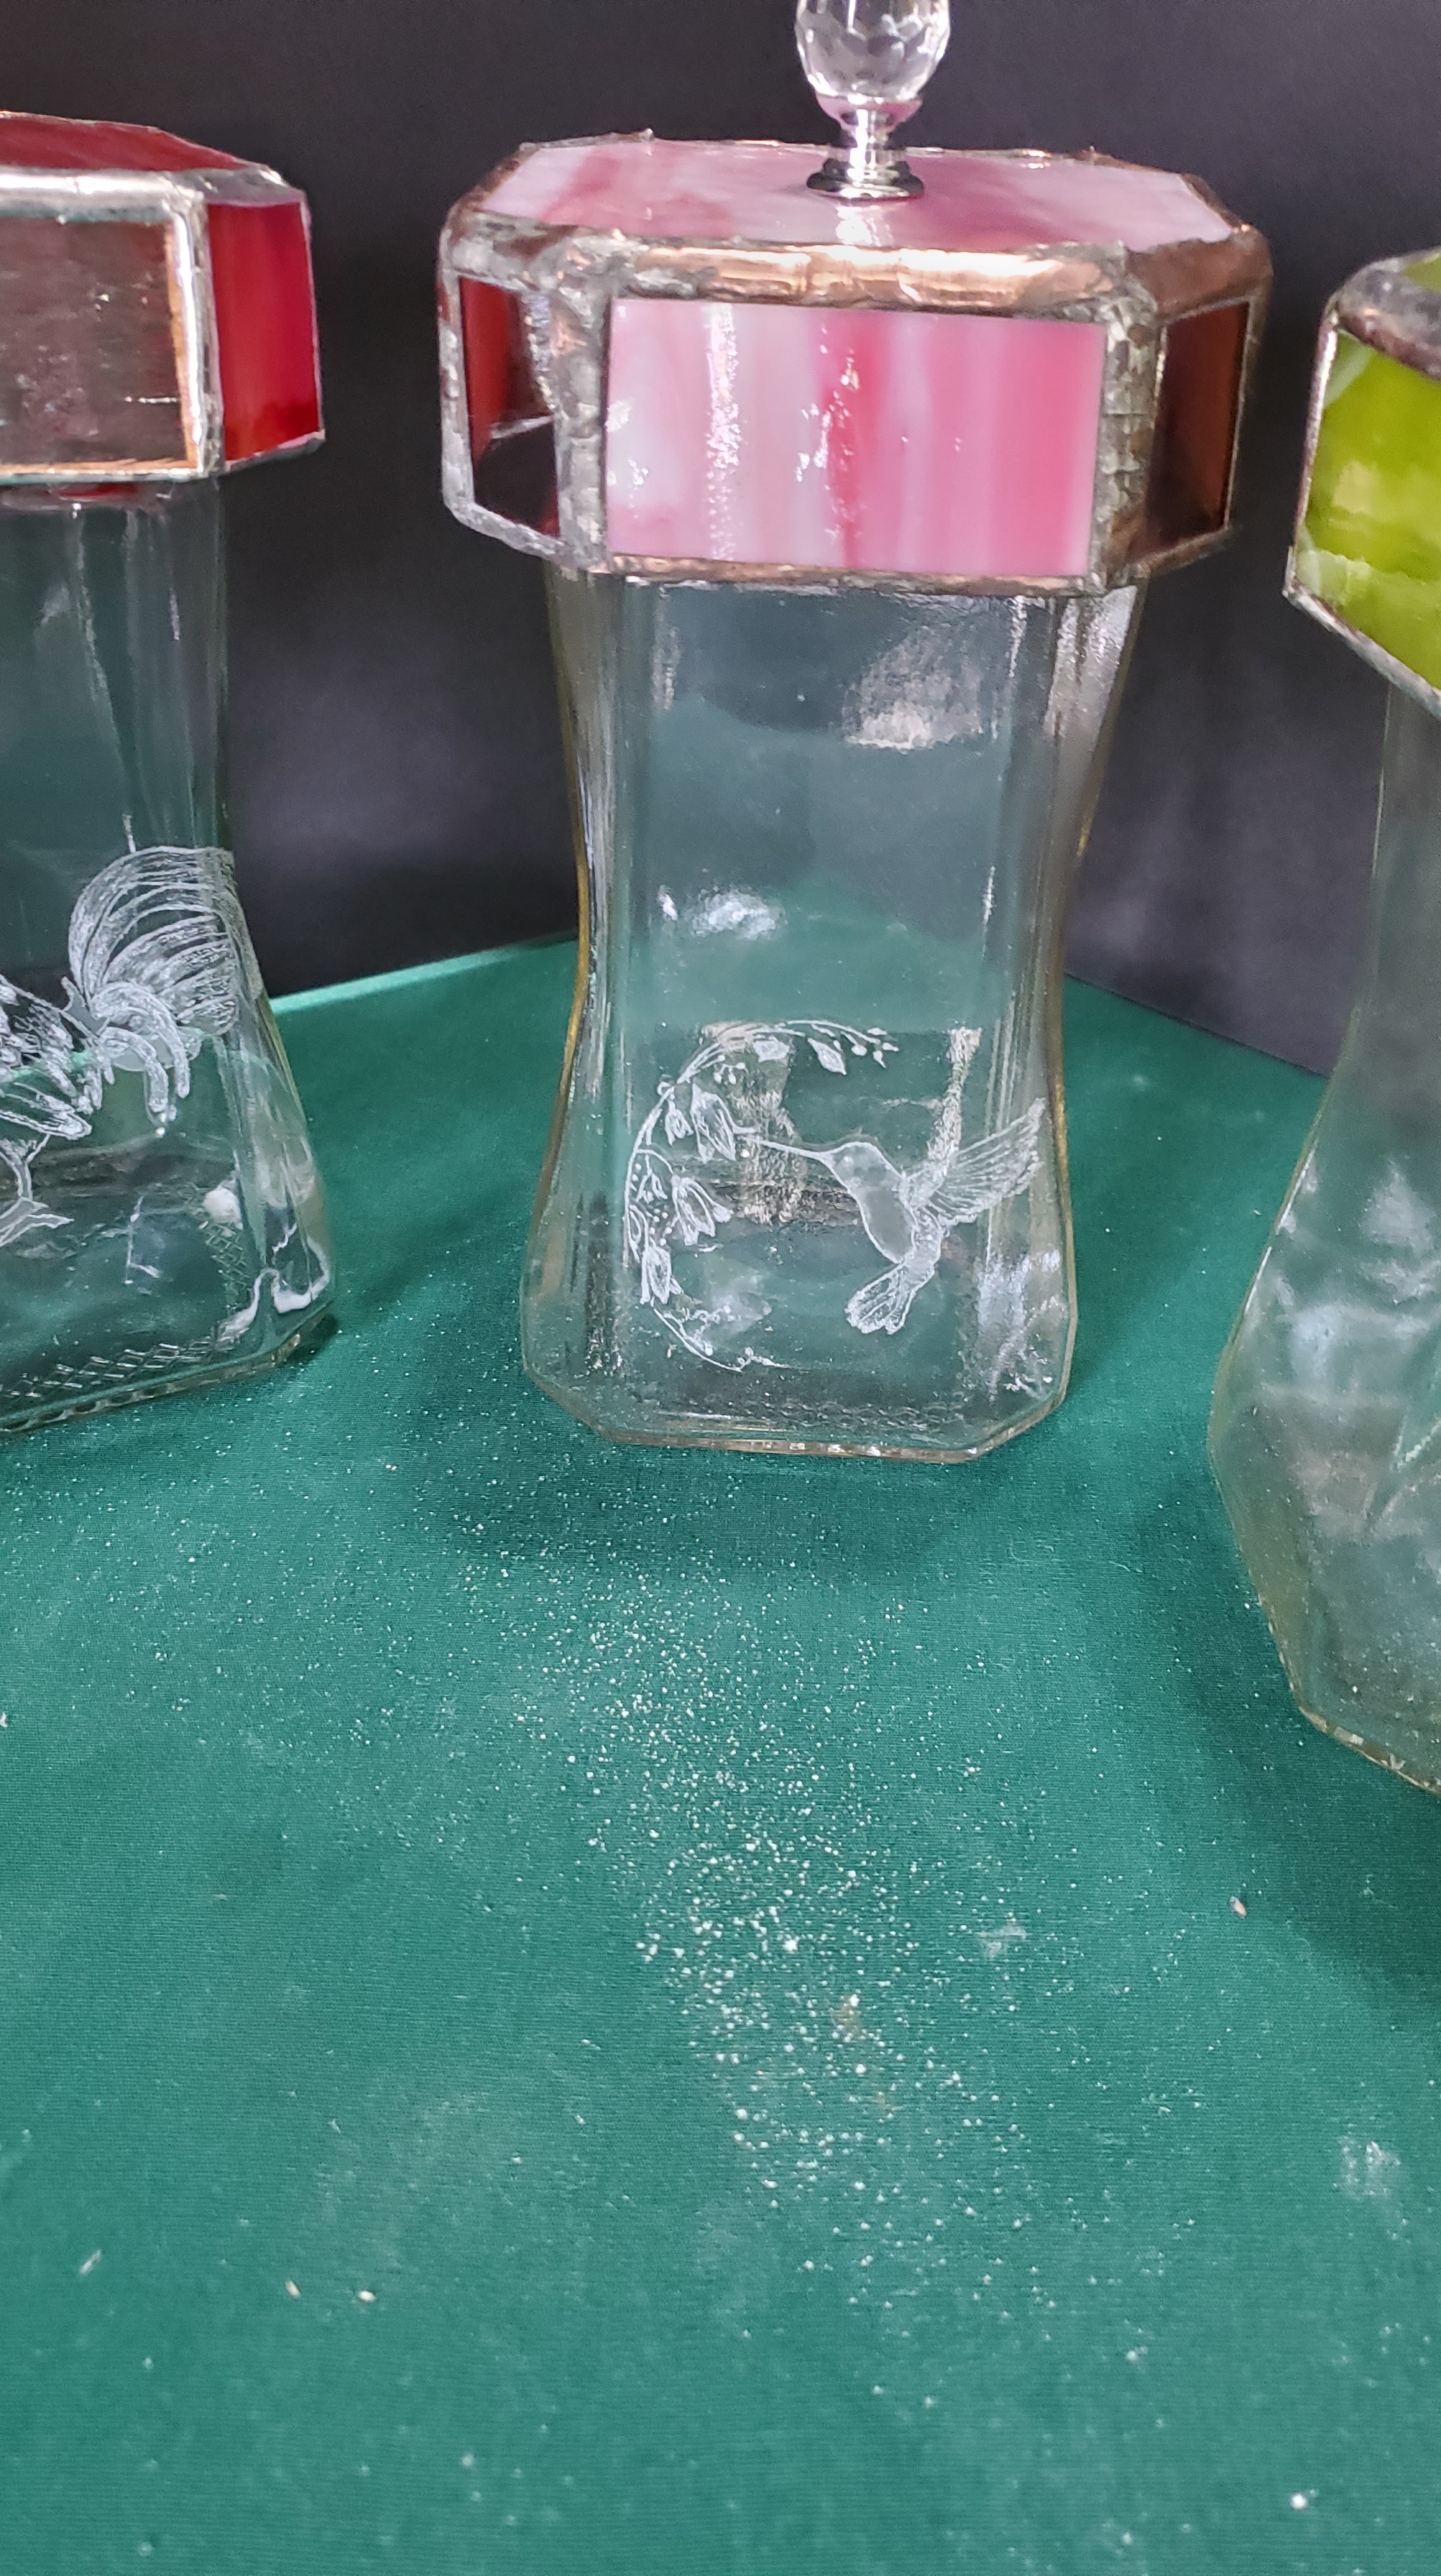
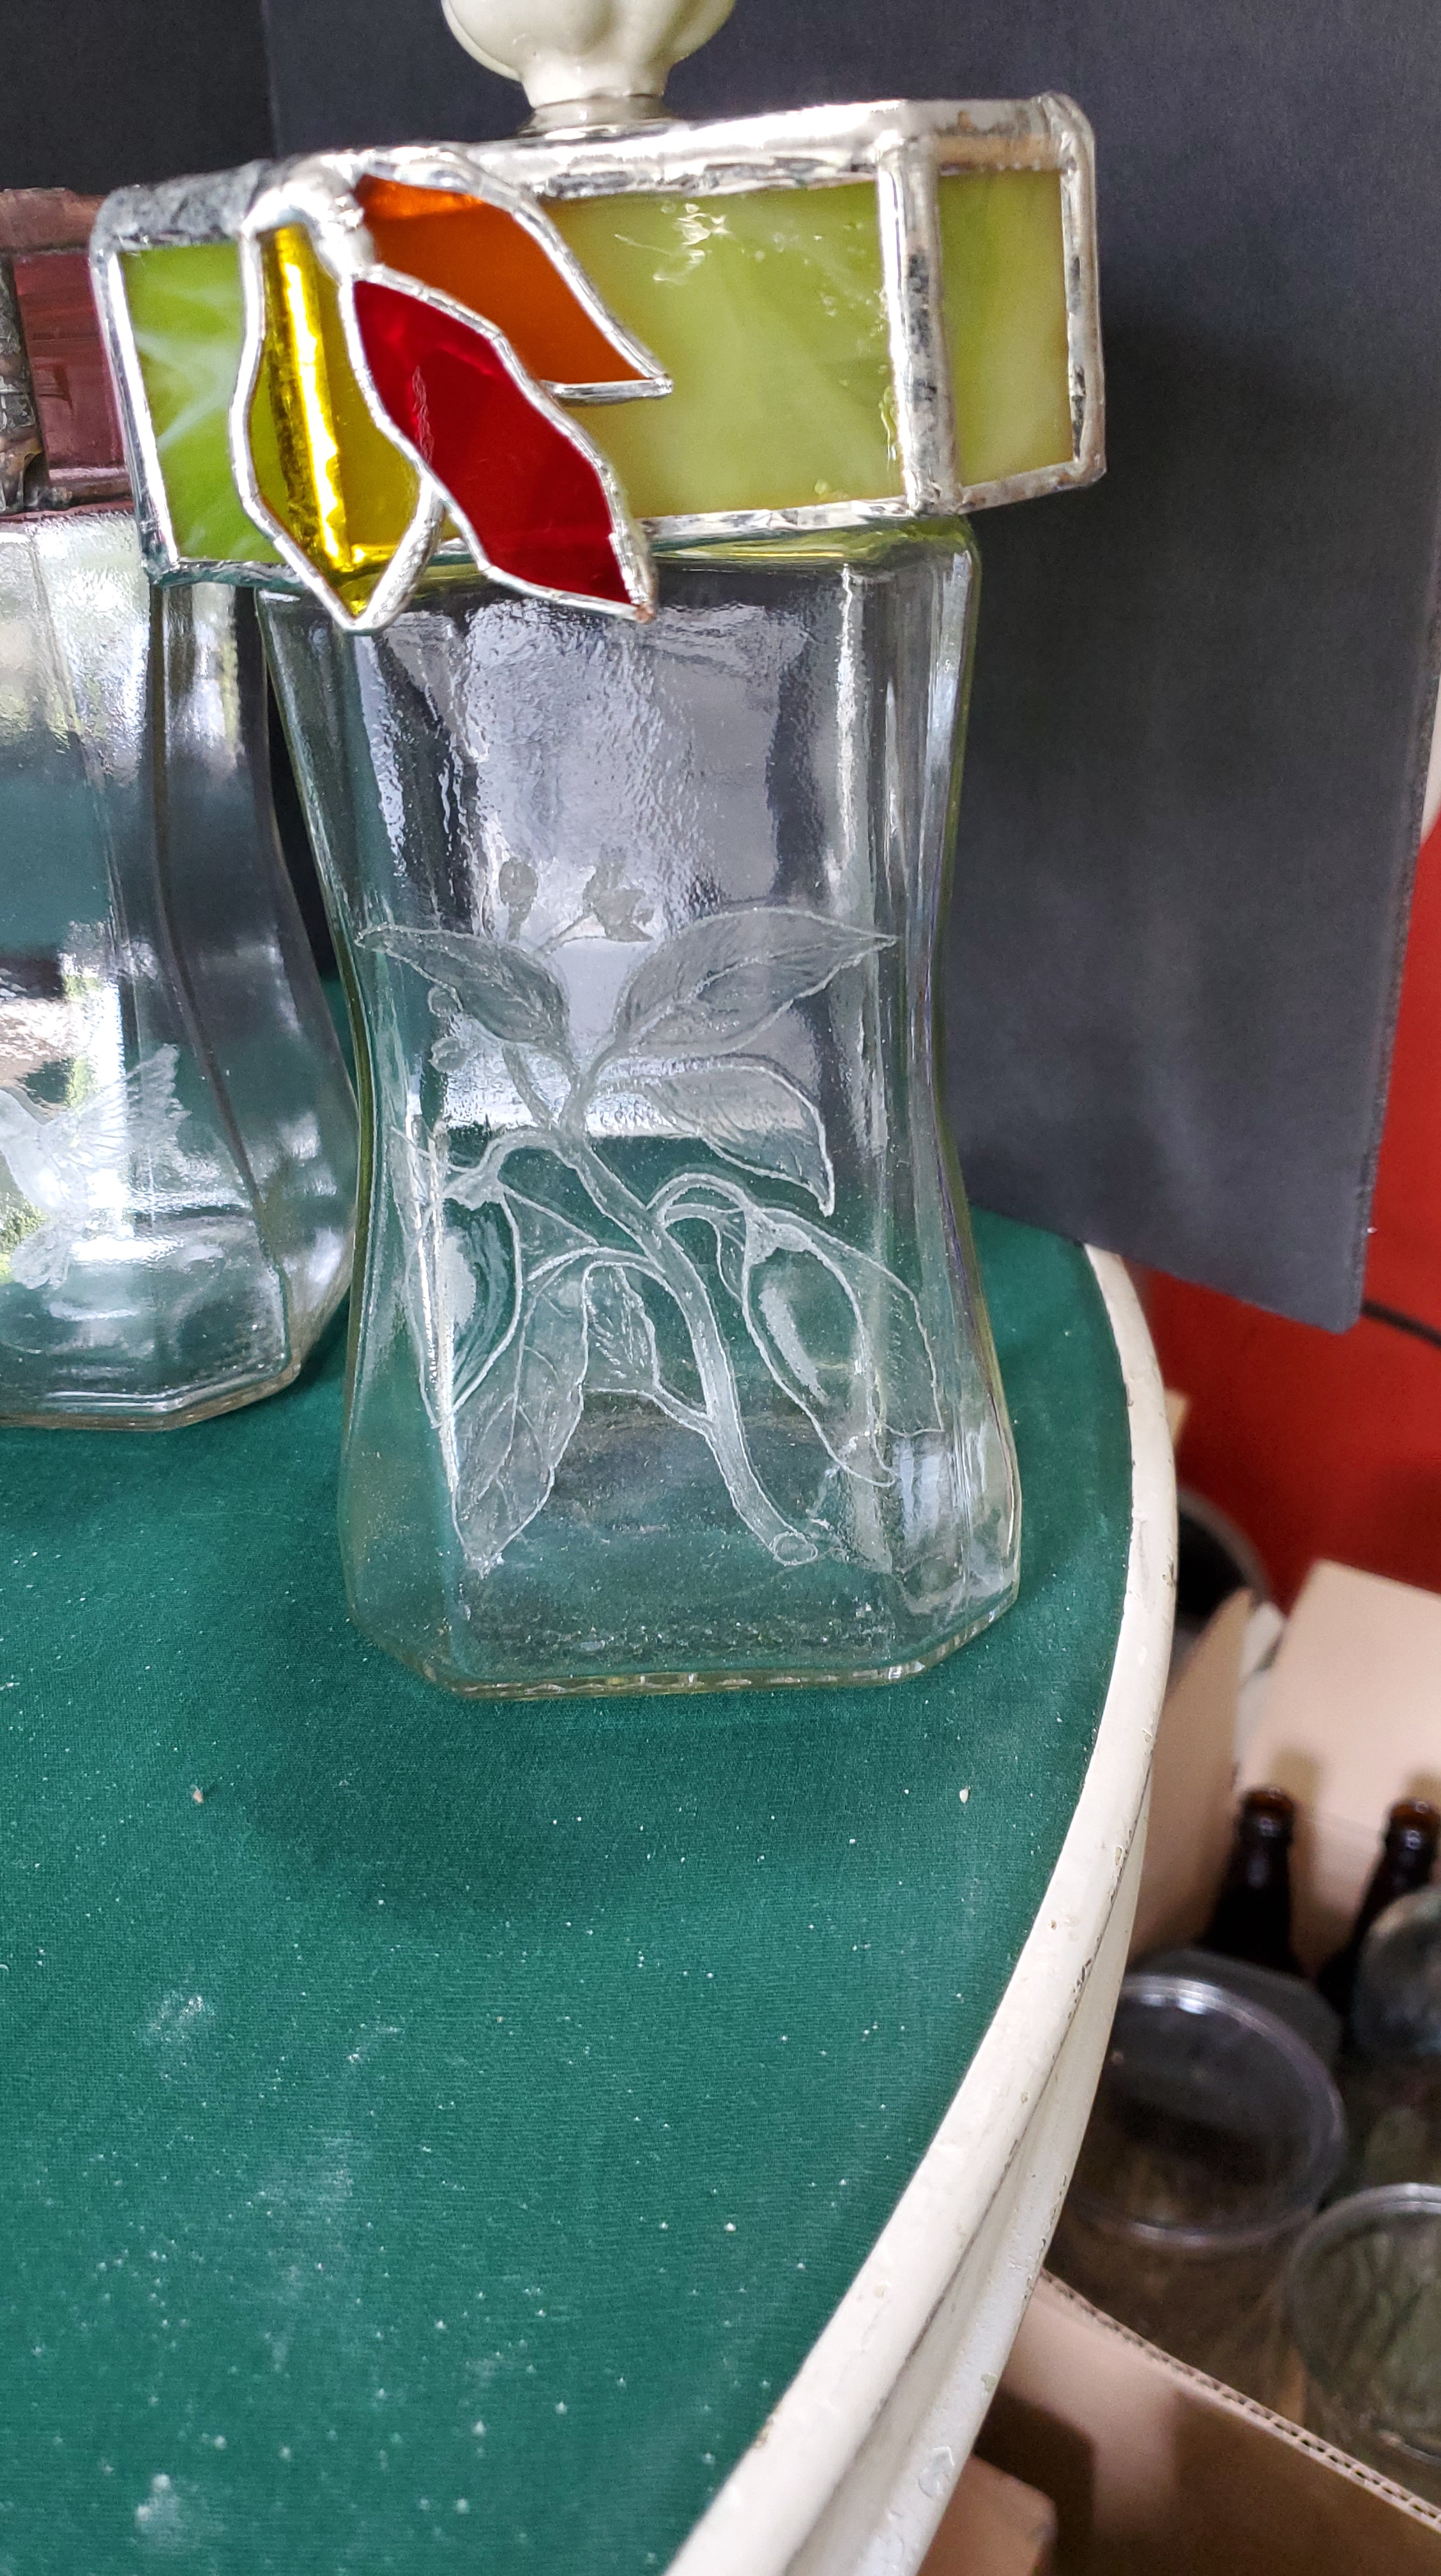
I am somewhat happy with most of these. More work has been done on the hummingbird canister because the soldering just wouldn’t come clean.
What I learned: Using solder that does not contain lead (since these canisters will contain food, I used lead free solder) is harder to work with. It seems to get dirty quickly and does not melt or flow as well as 60/40 lead/tin solder. I would like to learn more about why that is. It was a real challenge to get the solder to flow nicely. It also does not seem to take patina as well as other solder I have used. I will be doing some research on lead free solder before I use it again.
The original jars come with a plastic screw on lid. The stained glass replacement lids had a tendency to slide around and be insecure. To resolve this, I cut a glass round that is about a 16th of an inch smaller that the top opening of the jar. I ground the circle to create a rounded edge (for safety). Since the screws for the drawer pulls used on the lids are far longer than what is needed for the glass lid, I cut the screws down, leaving enough space for the glass circle (or stopper, if you will) with some nylon washers or copper tubing to create just enough space to allow the glass circle to drop down into the jar opening just enough to give the lid some stability.
These canisters are for sale on the “What’s for sale?” page.
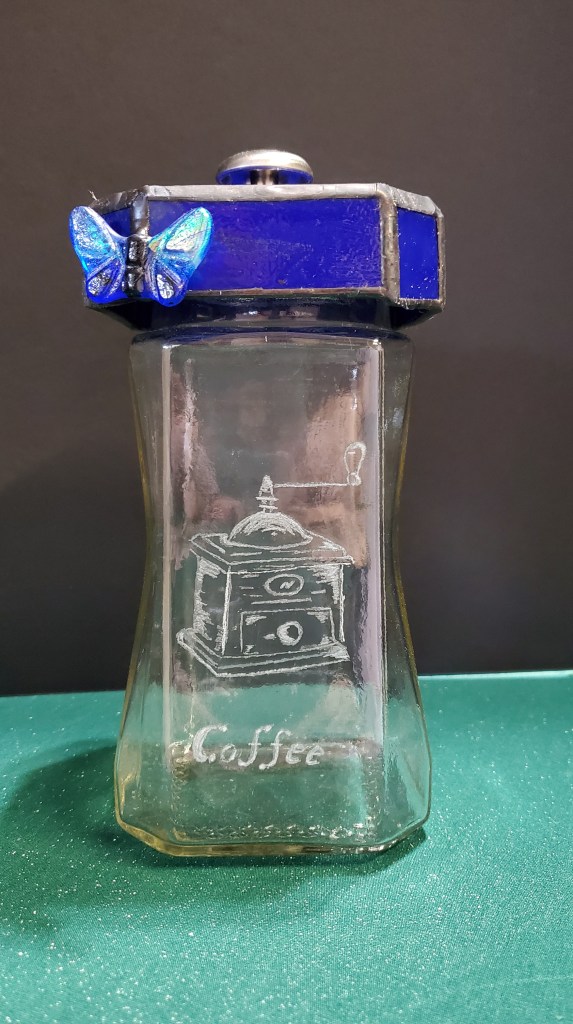
This project was also a prototype. It started as an empty Nescafe instant coffee jar. I really liked the shape of it. My mother and her husband go through several of these jars a month, so she asked if I could do something with it because it sits on her counter. So a coffee canister was born.
I’m not impressed with the lettering. Next time I want to letter something I’ll try using a stencil and better spacing.
The top was made from stained glass. I drilled a hole in the center and used a drawer pull handle. It would have been better to attach the existing jar lid to the stained glass, so that the lid could be screwed back on instead of just sitting on top of the jar. Currently it is kind of sloppy. Next time I’ll fit the glass to the existing lid, but hide it under the stained glass.
The ornamental butterfly is glass casting from frit and a little bit of dichroitic glass to give some shine.
For Christmas, my husband bought me a wet saw and diamond hole cutters for the drill. I have yet to try them out, but keep checking back to see what other projects we have come up with.
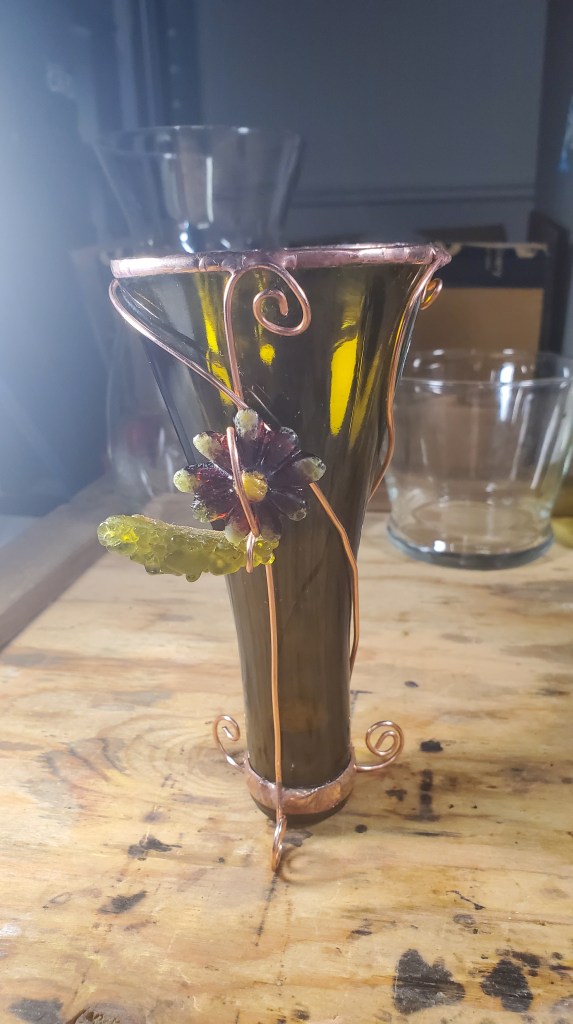
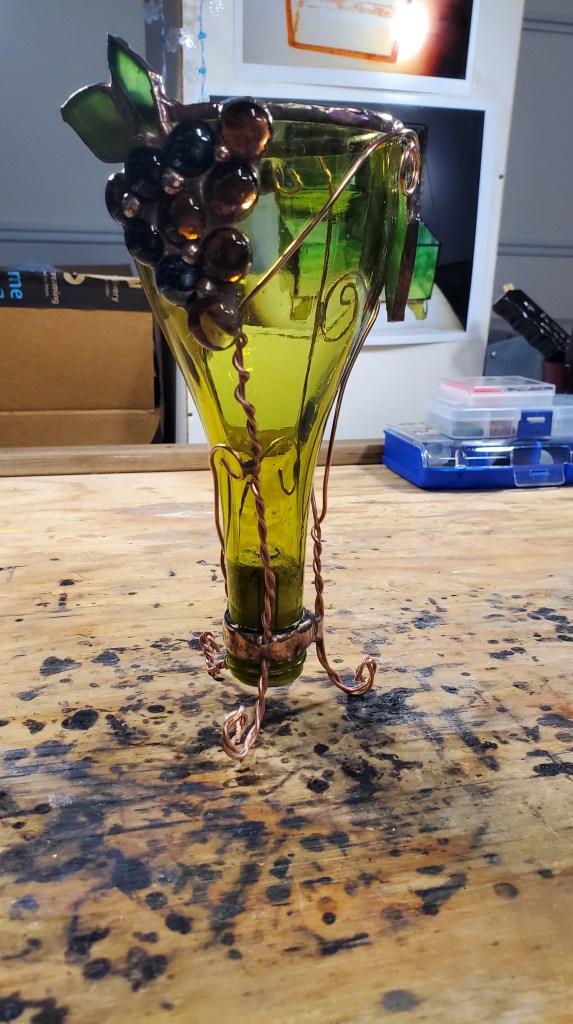
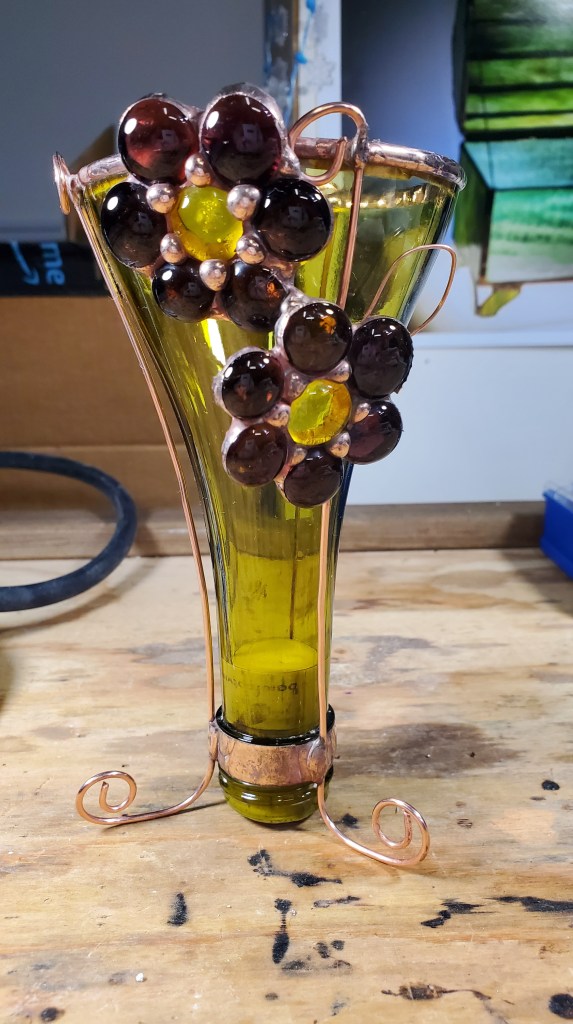
These items are made from the tops of wine bottles. Each has a different shape. All three have copper wire soldered to the neck of the bottle to establish a base so they can stand solidly. Each has been embellished with a unique design. The item on the far left was created from glass cast flower and leaf. The leaf was cast from ground up wine bottle. The item in the middle is decorated with glass gems to look like grapes on a grape vine. I am happy with how these turned out.
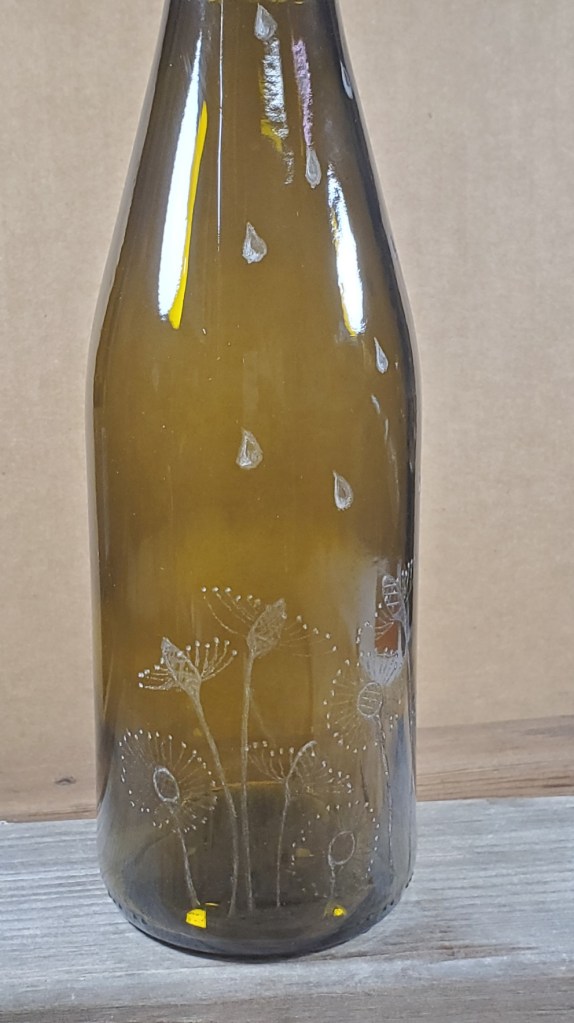
Only the neck was cut off of this wine bottle to make a bud vase.
A circle of dandelions and rain drops have been engraved around half of the bottle.
Next time, I’ll pick something a little prettier than dandelions.

This windchime was built from salvaged pieces from multiple wine bottles. Note: there is a great deal of difference in the color of bottles. The only way to make sure that the color is the same is to organize your bottles by the wine brand.
Copper tubing was slightly bent and holes were drilled into the bottle rings before soldering stained glass pieces to them. The rings are hung with jewelry chain and soldered to the copper tube.
This is a prototype, an idea that could be expanded by soldering stained glass flowers to the bottle rings. I would also drill holes into the copper tubing and run the chain through the tube instead of soldering to the tube. I think this would give a much neater look.
One thing is sure, this is sturdy. It has been through several Northwest wind storms and held up just fine.

This bottle craft is one of my favorite designs. It has sparked all kinds of ideas. I am thinking of other flowers and maybe butterflies or dragon flies…..
The lessons I learned on this was sizing. I think the petals are a little long and narrow. I would redesign the next one to have shorter, fatter petals. But I do like this one.
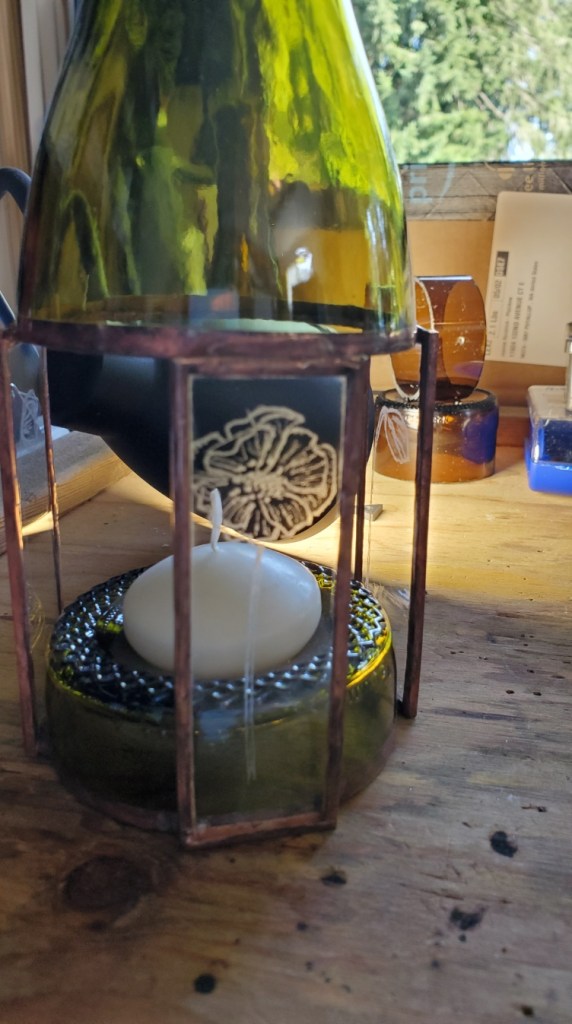
This candle holder is now filled with a citronella scented candle.
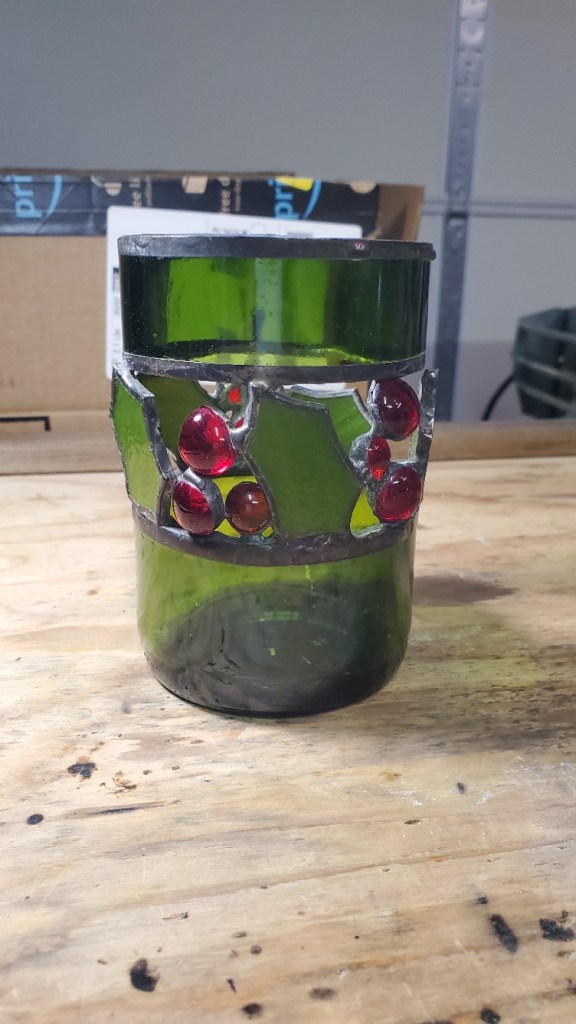
One of the first bottles I was able to cut cleanly was a very deep green. It looked like the perfect color for a Christmas candle.
I used green stained glass to cut the holly leaves and red glass nuggets to create a ring of holly around the bottom of the bottle, then topped it with the 2nd bottle section.
The candle holder has since been filled with red scented candle.
Not bad for my very first bottle craft.
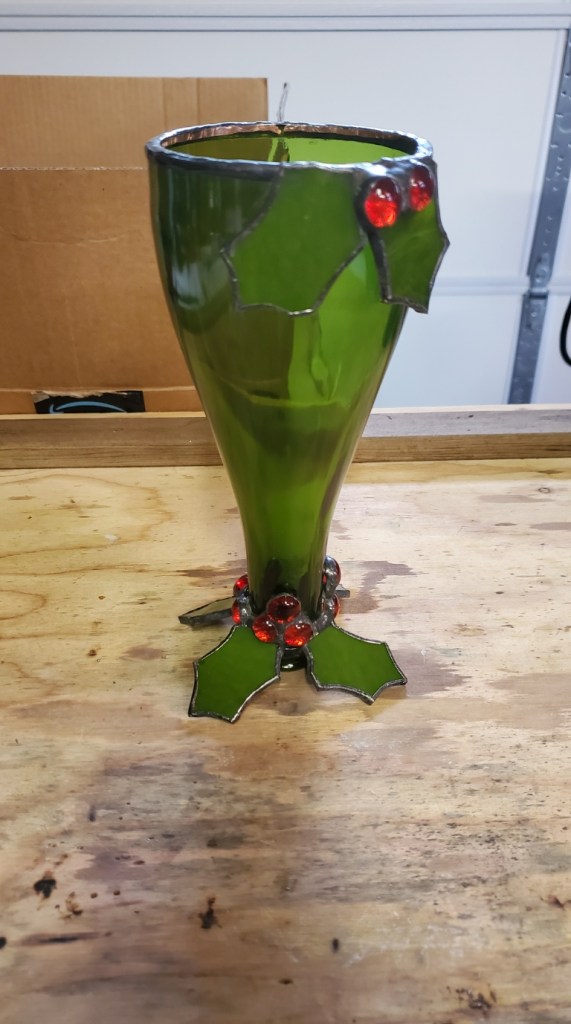
This is the top portion of the Christmas green wine bottle.
Together with the candle, it does make a nice table decoration.
I followed the same holly pattern, thinking this may make a nice pair for a table decoration. The pattern was applied to the bottom (or top, if you will) of the bottle in order to allow it to stably stand up.
I found wine bottle lights on Amazon that give the bottle top a nice twinkle. The lights also come in colors.
This project involved turning the bottom of the bottle upside down and attaching it to the top portion of the bottle with short lengths of clear glass.
The divot in the bottom of the bottle is just large enough for a tea light candle. The side clear glass lengths were engraved with a pansy design.
I learned from this project to cut the side lengths a little narrower than I did here – these are about an inch wide. A narrower side length makes for a more attractive join when soldered together.
A copper wire hanger has been attached so that the bottle can be hung outdoors.

Using the lessons previously learned this candle has been made with narrower side lengths. This time the engraving has been done directly on both the top and bottom of the bottle. It is hard to see the engraving on the bottom of the bottle because the white candle obscures it in the photo, but it is a border pattern that circles the entire bottle.
This bottle was built with lessons learned, but it was also the first bottle that I fashioned a hanger for. This hanger design is used on all of my bottled candles so that they can be hung outdoors.
